Teaching Heart's
Halloween Lesson Ideas!
Lots to see here - so don't be scared to look at
the page! Free printables, ideas, and so much
more!
Kids will think they are being spooked into
learning!
Updated on Sept. 30,
2011

 If
you were a witch and could grant three
wishes, what wishes would you grant? If
you were a witch and could grant three
wishes, what wishes would you grant?
What
scares you? Why?
What
are you going to be for Halloween and
why?
Describe
your halloween costume. Pass your journal
to a friend and have them read it out
loud. Could they guess what you were
going to be?
Write
a recipe for Witch's Brew. What would you
put in it? How would you mix it up? Who
would drink it?
Describe
your magic broomstick. What does it look
like?
Draw
a pumpkin growing on a vine.
Draw
a jack o' lantern.
Draw
something bigger than a pumpkin.
Draw
a haunted house..... what would be inside
it?
What
will you do on Halloween? What will
you dress up as?
Draw
a spider.
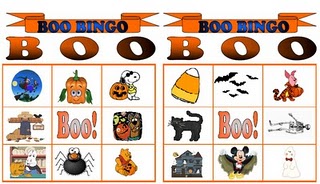
Boo
Bingo, Anyone?
Getting
ready for a preschool or Kindergarten
Halloween party? Then you need to
download these fun and free Boo Bingo
Halloween cards and calling cards that I
recently put together to share.
You
can click here to download
the files in PDF.
look at
these lovely printables. You can download
them here in PDF for free, free,
free, free… It is four pages of
activities which you can see below. If
you missed the free treat shared
yesterday, go here and learn about
that!!!

Grab a pack
of Halloween rings from your dollar
store. I found mine in packs of 50. I
love that there are six colors in the
bag. That makes them even more fun and
the learning possibilities even more
endless. Yeah!
You can
sort them.

You can
look at your sorting and create a graph
to match them.

You can
work on counting by placing them in the
caldron to match the number.

You can use
them as markers. I used them to work on
Kindergarten words. But you could use
them to mark off anything. So much fun! 
You can see
how many you can put on all your fingers.
You can put a few on one hand a few on
the other and make a problem. Here you
see the math problem 2+4 = 6.

Work on
multiplication. Ask your students to put
them in groups to make a multiplication
problem. Three groups of three rings is
3×3=9. Roll one dice to tell you how
many groups and another to tell you how
many are in each group. So if you roll a
2 and a 4, you would lay out two groups
with four in each group. This would make
2X4=8!!! Hands-on FUN if I do say so
myself!!!

I am sure
you can think of a few other ideas…
if you do, please comment and share.
For more fall learning click
here.
Need some books to read in October with
ideas to match? Click here
for loads of ideas!
|
A
Huge Halloween High Five to Kim Koehler
at kckoehler12@yahoo.com for sharing
the following two glyphs, pictures, and
printables to match!
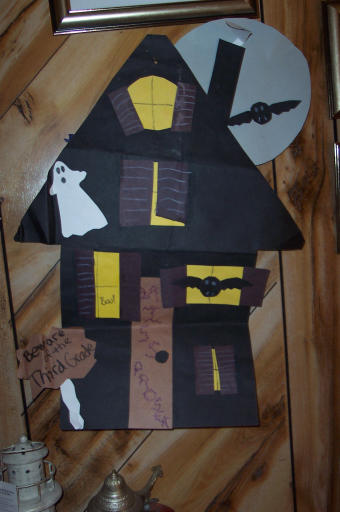
| Here
is the key for the haunted house.
I do either a haunted house or a
scarecrow each year. I recently
had students who did not
participate in halloween, so we
made scarecrows that year instead
of the houses. I have the key and
worksheet in Word with the neat
font too. So here it is here: It
is a pretty complicated glyph
that I do with my third graders. black house
means I am a girl, brown house
means I am a boy
tall door= I
have pets, short door= I do not
skinny door=
I have a computer, wide door= I
do not
tall
chimney= I have blonde or red
hair, short chimney= I have black
or brown hair
skinny
chimney= I wear glasses, wide
chimney= I do not
yellow moon=
8 years old, white moon= 9 years
old
The number
of windows equals the number of
hours I go trick or treating
The number
of ghosts represents my brothers
and sisters
The color of
my sign tells the month of my
birthday
The bats
flying around mean nothing but
halloween fun!
*** You can
change any of these to fit with
an all halloween theme or any
other questions you think of. I
also have the kids put spider
webs on it, but dont have any on
my sample. I show them how to put
the webs on using my sample and
then take them off to store it.
It is pretty beat up from being
around for a few years, but still
gets the idea across pretty well.
|
 Printable
Key / Printable Worksheet
|
| Here
is the pic of the scarecrow glyph
we do. I use fabric scraps for
the patches and a cut up raffia
bow for the hay on the arms and
legs. I also will add the key
too! Key
Hat=
favorite color
Shirt:
yellow= girl red= boy
Plaid:
diagonal= has gone on a hayride
straight= has not gone on a
hayride
Buttons: 2
buttons= I have carved a pumpkin
3 buttons= i have not carved a
pumpkin
Patches: 1=
I love spring 2= I love fall 3= i
love summer 4= I love winter
Smile: 8
stitches=I am 8 9 stitches= I am
9
Eyes:
triangles= I like non fiction
books squares= I like fiction
books
Nose:
triangle= I like chapter books
circle= I like picture books
|
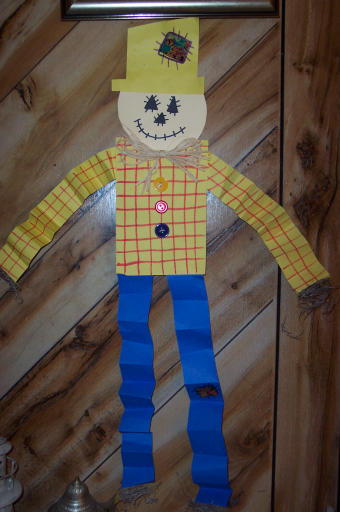 |
| It
takes my third graders usually
two days to complete it. I hot
glue on the straw and buttons for
them. I usually have them trace
and cut out the pieces on one day
and then glue them together on
the next day. |
|
|
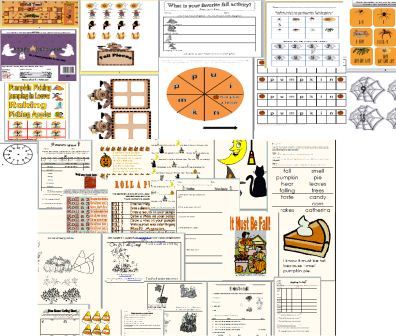
TEACHING
HEART’S FALL & HALLOWEEN PACKET
1
 1.) Dem Bones
Sorting Sheet - Use with Dem Bones Candy
to Sort the Candy. Includes questions for
students to answer when they finish
sorting. You can read the questions to
them (K-1) or have them read the
questions and answer them on their own
(1-3).
2.) Dem Bones Graph
(FREE TO PRINT) - Use with Dem Bones
Candy (MADE BY BRACHS) after you do the
sorting activity. Students color the
graph to match the candy in their bag.
Students switch graphs with a partner and
answer the questions about their
partner’s graph. (This activity is
found on CDROM # 2 - It has been updated
and the sheet looks a little different
than the one found on CDROM # 2)
3.) Dem Bones Mini
Book – Have your students complete
this book after they have done the Dem
Bones Graph and Sorting Sheet. This
is a great way to end your sorting and
graphing lessons. You can complete
the book as a group (K-1) or have the
students complete the book independently
(2-3
4.) Roll and Eat Dem
Bones Game – Print on cardstock,
laminate, and cut game boards. Now
that we have finished using our snack
pieces, let’s play a game. Your
teacher will break you up into groups and
give your group dice. Sit in a
circle and take turns rolling the dice
& following the directions. Use
the chart below to decode what each roll
means. If you roll something that
you can’t do, pass the dice on and
do not do anything. The game is
over when one player has no pieces left
after their turn! If you wish not
to eat the candy, throw it away instead.
(1-3) (NOT FOUND ON CDROMS)
5.) Picture Poem
Activities - This is a five page document
of printables and cut-outs for you to
use. The first page is a Halloween Poem.
Students read the words and the pictures
(1-2) or the teacher reads the poem as
the student reads along (k-1). The second
page includes large graphics of the nouns
in the poem. The teacher can print,
laminate, and cut these to use with the
poem. The last page is an independent
activity sheet for your student to
complete after you have done some
activities with the poem. The sheet
asks the student to answer questions by
drawing an answer (k-2). (NOT
FOUND ON CDROMS)
6.) Roll A Pumpkin
Game (1-3) – Print on cardstock,
laminate, and cut game boards. This
is a dice adding game that your students
play in teams of 2-4 players. Students
work on adding and following directions
while they play this fun game. (NOT
FOUND ON CDROMS)
7.) Witches Making
Words Activities (1-3) – Includes
the letters in the word Witches. Your
student must use the letters to complete
various activities. This can be
done independently or as a group. (THIS
IS FOUND ON OUR CDROM # 4)
8.) Shopping For
Fall Words (1-2) – This is a math
activity that involves adding more than
two digits. Students are given a
word. Each letter in the word
represents a dollar amount. Students
add up all the letters in the word to get
a total cost of the given word. (NOT
FOUND ON CDROMS)
9.) Pumpkin Poop Bag
Topper – A cute gift for your staff
or another adult. Just print these
labels and stick them to a ziplock
baggie. Place candy corn in the
baggie. Slip a bag in a favorite
friend’s mailbox on Halloween Day.
Sure to be a hit with your teacher
friends. They print on 3
1/3" x 4"mailing labels/ AVERY
8164 (NOT FOUND ON CDROMS)
10.) Candy Corn
Rhyme Center - Here is an
easy center to make. Print,
Laminate, and Cut the pieces given.
Then have the students organize the
pieces on a pocket chart. All the
words that rhyme are placed next to each
other in the pocket chart. When the
students have completed the center, you
may choose to have them complete the
center sheet found on page 3 of this
document.
NOTE: You may choose to make Ziploc
centers. Place all the materials in
a Ziploc and have the student find the
rhyming words at their seat.
(NOT FOUND ON CDROMS)
11.) On a Fall Day
Mini Book (k-2) - Have your students
color page two of this document. Then
have them cut out the pictures and glue
them into the book on pages 3 – 4.
When they are finished have them cut the
book and staple together. They can
finish the sentence and illustrate the
last page. This book is a simple
counting/following directions book. (NOT
FOUND ON CDROMS)
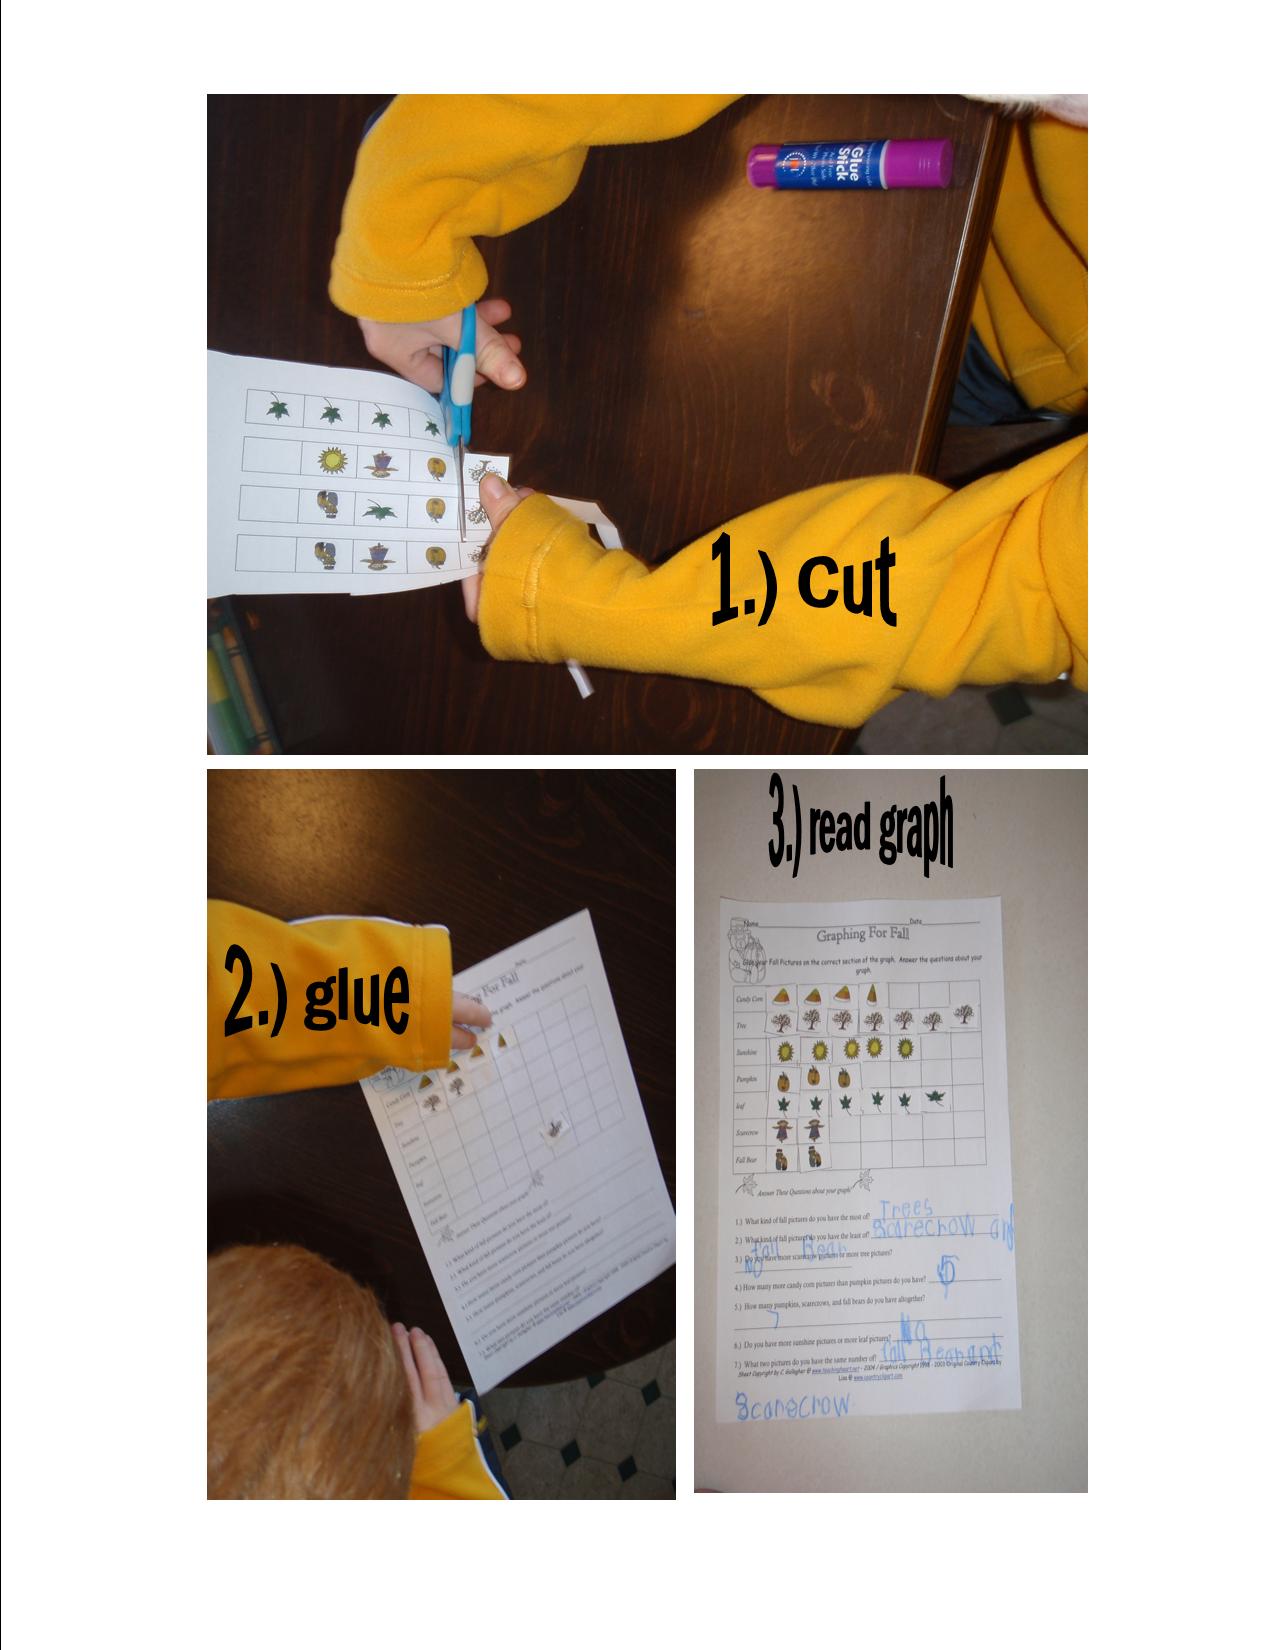
12.) Graphing For
Fall (1-3) - Print pages 1 -2 on
separate sheets of paper. Cut out a
few of the fall pictures and show your
students how to place them on the graph.
Then, allow them to complete the rest.
When they are finished, instruct them to
complete the graph questions. (NOT FOUND
ON CDROMS)
13.) Fall Mini Book
– 13 page file - Includes Pocket
Chart Vocab. Cards. A Big Book For
the Teacher. A Mini Book for each
student. An independent sheet to
complete. (k-2) (NOT FOUND ON
CDROMS)
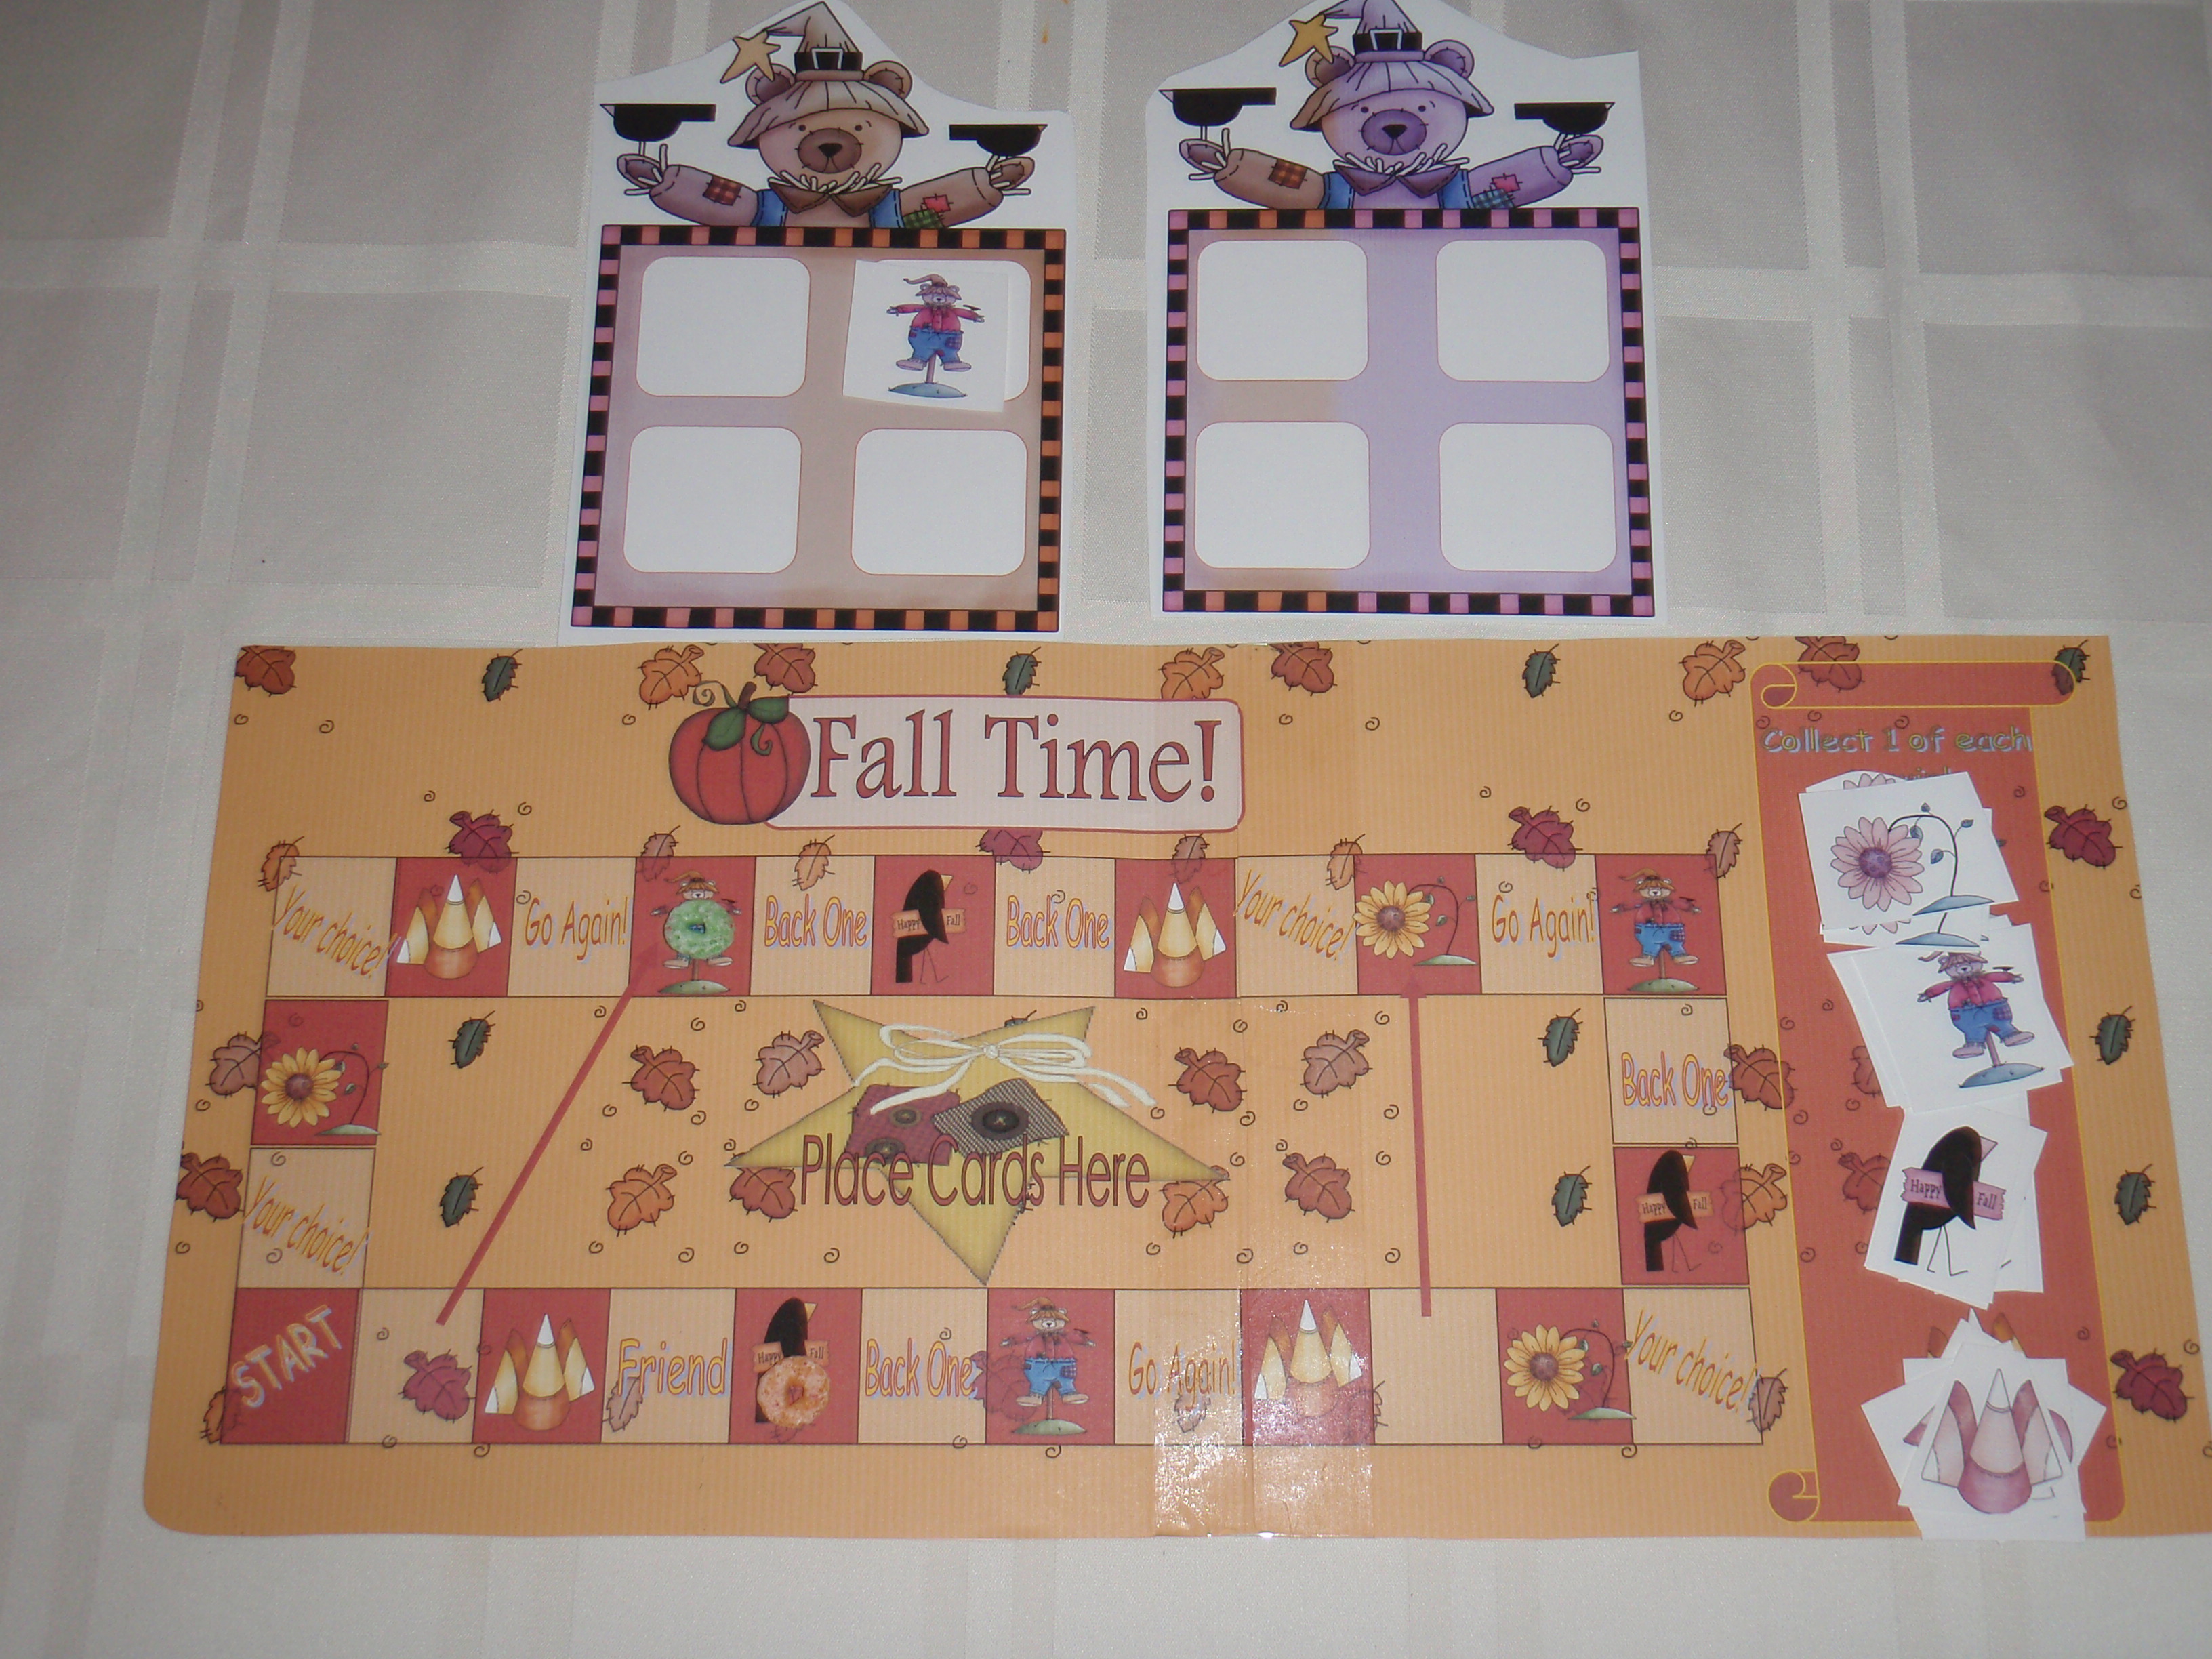
14. – 16.) Fall
Telling Time Game – Comes with
printable gameboard, game pieces, and
telling time flash cards. Three
files. Fall board game directions
are included. Files in PDF and
Publisher or Word.
17.) Halloween Candy
Bar Wrapper in PDF – give out cute
Halloween treats. Just print on
regular paper and wrap a Hershey Bar.
18.) Fall Graphing
Center – Manipulatives for making a
class graphing center. Includes a
center sheet.
19. -20.) Halloween
and Pumpkin Spinner Games - Practice
reading and writing skills with these two
ready to print games. Players take turns
with their partners and spin the spinner.
When they land on a letter, they write it
in the corresponding space on the card
provided. The first player to spell
the word is the winner!
21.) Spider Tally
Mark Center – In Publisher and PDF.
4 pages. Put all materials in an
envelope. Student takes center to
their seat. They match the spider
to their web by counting the tally marks.
A center sheet is included.
These are
Word files that will be sent to you in
Zip Format via email. They are sent in
less than 24 hours after payment through
Paypal! Please make sure your email is
correct when you order!!!! Thanks!
Total Price
= $12.50 US
 
Halloween and Fall
Graphing Ideas!!!
Graphing For Fall From Our Fall and
Halloween Packet (seen above)
*What is
your favorite fall activity?
Free from
our Graphing CDROM
Download
the free printables at P1 - P2 - P3
* Graphing
for Halloween - Click Here to Down
Load the Sheets below!
|
The Witch and The
Little Orange House Story
You Need
Siccors, orange paper, and story props.
Download story props
here.
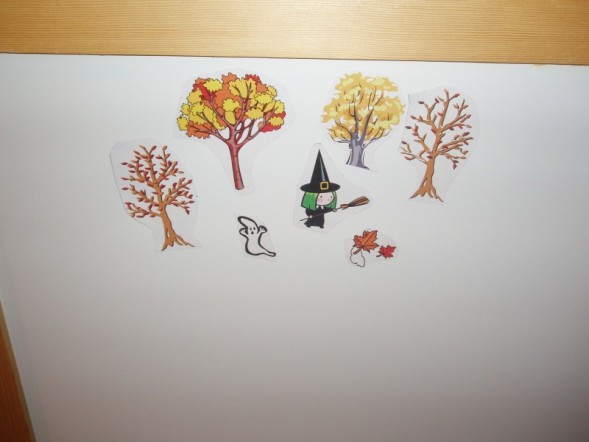
Place the trees on a
board or overhead to look like a forest.
Begin telling story below.
Once upon a time a
very small witch was walking in the
woods. (Place the witch in forrest) The
cold wind was blowing the dry leaves all
around her (Place the leaves graphics
next to the witch). The little
witch was frantically searching for a
house for the winter. She could not
find one.
(Drop orange
paper)Suddenly a piece of orange paper,
blown by the wind, landed at her feet.
She picked it up. The little
witch looked closely at the paper and
then she said, "I shall make myself
a little house from this piece of orange
paper."
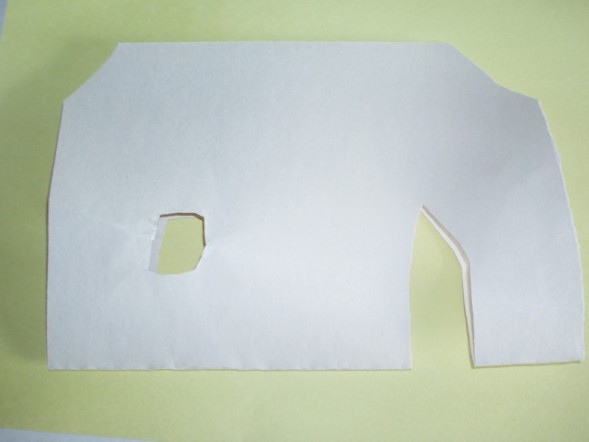
She folded the paper
in half. Then she took her scissors (she
always carried a pair in her pocket) and
cut off the two corners to make a roof.
Hold the paper on
the fold and cut off the two top corners
(all four corners cut to make a roof, but
also a pumpkin shape)
"This will do
just fine," she said as she looked
at her new house.
"But I will need a door." With
her scissors she cut a door. Since
witches
always wear pointed hats, she cut a
special door. It looked like this.
Make the
cut like a rectangle, door shape but with
an angle pointing up for a smiling mouth.
The little witch
walked through the door into the little
orange house. (Have the witch cutout walk
through the door)
It was very dark inside. She quickly
hurried back out.
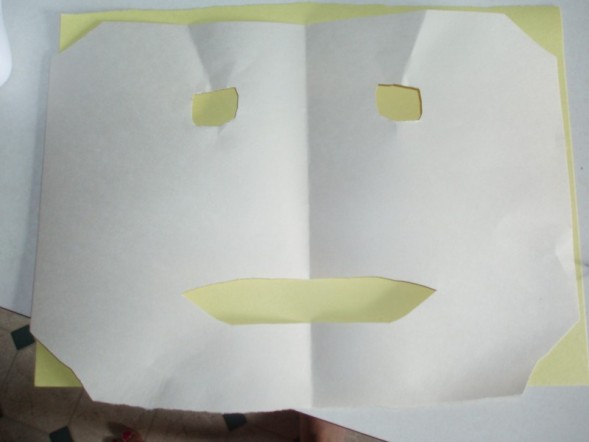
"I will need to make windows to let
in the light," said the little
witch.
She cut a front and back window that
looked like this.
This cut is
rather tricky. You need to
refold the paper (to space the eyes
at the side of the head!) and cut through
all of the layers to make two eyes at the
top of the paper. Practice!
Oh, it was a very
fine looking house. Her very own little
house with a roof, a door and windows was
all finished. But just as the
little witch started to go inside for the
winter, she saw a tiny ghost floating
down the windswept path (use the ghost
cut-out). As the tiny ghost
came to a stop near the little house, the
little witch saw that she was crying.
"Why are you crying?" asked the
little witch.
The tiny ghost stopped crying and
answered, It is cold and windy. It is
getting dark. And I have no place to
spend the winter."
"You may spend the winter with me in
my new house, said the kind little
witch.
"Oh, thank you," the happy tiny
ghost said as she peeked in through the
window. This is a very nice house,"
"First," said the little witch,
"I will need to make you a little
door of your very own. She took her
scissors again and began to cut. She cut
a very tiny door. It looked like
this.
This cut is the
nose of the jack-o-lantern. Make a
small triangle type cut between the eyes
and the mouth.
The two happy new
friends went inside. The tiny ghost went
in the very little door, and the little
witch went through her own special door.
(Place the cut-outs through the door and
then hide them out of sight.)
All winter long they lived happily
together inside the little orange house.
Now open the house
to reveal the pumpkin. I always do this
once as a model and then have the kids do
it with me. Then they do it with
partners. Finally, they try it at home on
an adult. They are alwasy tickled by this
activity!
View More Directions
|
 Graphing
Spooks Graphing
Spooks
Here is a graphing
activity center. Which halloween character is
your favorite Spook?
There are two printables to match this activity.
To learn how these graphs work, please visit:
http://www.teachingheart.net/graphing1.html
Click
to download manipulatives
Click
to download the center sheet
Like our graphing
activity? Try our Graphing Center CDROM. 100's of
happy teachers!
http://www.teachingheart.net/graphingcdrom.html
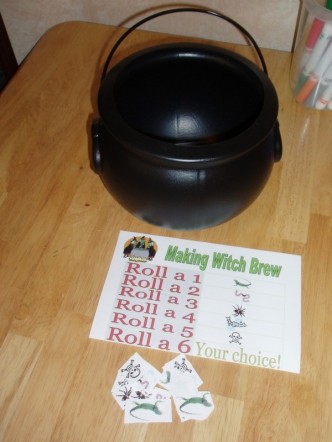
Witch Brew Dice Game
You Need: 2-4
players
1 dice per game
Each player needs to cut-out their playing pieces
- Click
to download playing pieces!
Key - Click
to download
Pot set in the center of players.
Players take turns rolling
dice. They add 1 item into the pot based on the
key. The person to fill the pot with their pieces
first is the winner.
CRAFTS
| Come view this Candy
Corn Craft |
Awesome
Crafts |
| Ghost Necklaces You will
need wax paper, Elmer's glue, a black
permanent marker, hole puncher, and black
yarn.
Squeeze
about 2 tablespoons of glue onto a piece
of wax paper. Pick the wax paper up and
let the glue move around. You can move
the glue in any direction you wish. When
you have the shape you like, put the wax
paper in a warm dry place to dry.
When the
glue has dried, peel the shape off of the
wax paper. Punch a hole close to an edge.
Make two round eyes and a round mouth
with the marker. Cut a piece of yarn long
enough so that the gluey ghost hangs
comfortably around your neck. Tie a knot
in the yarn.
Make a Footsie
Witchie
|
Make
Your Own Treat Bags
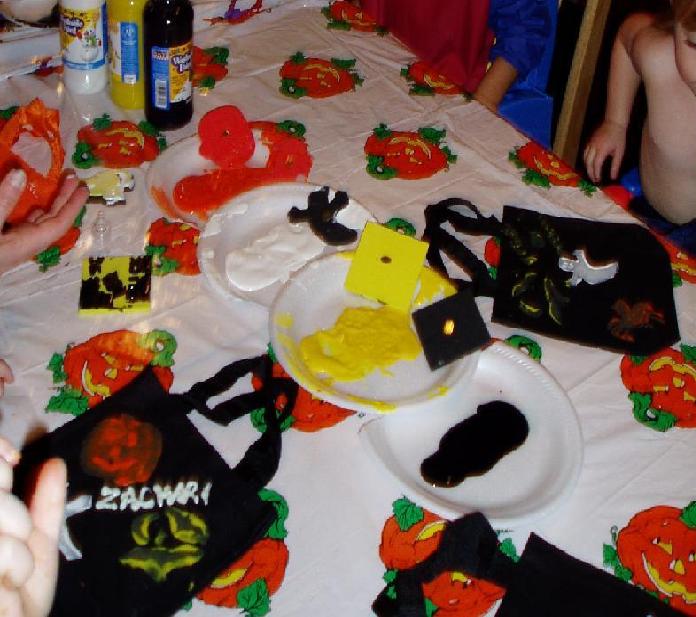 Here is a cute and
fun craft to do with younger students. I
actually plan on doing this with my sons
playgroup (ages 2- 3). Purchase the
Halloween colored (Black and orange) tote
bags at Oriental Trading. Also purchase
the foam stamps and some paint. I would
keep the colors simple for younger
students. Black, white, yellow, and
orange! Have them place the stamps on the
bag. When they are finished they will
have cute bags for Trick-or-Treating!
Practice
Your Skills While Playing a Board Game
You can print one game for each student
in your class. This makes a great
Halloween treat from the teacher!
CLICK HERE TO LEARN
MORE!!!
SPIN THE
WORD Halloween Game. Students take turns
spinning the spinner. First person to
spell Halloween wins.

This activity is found on the Teaching
Heart Fall/Halloween Packet. Click here to learn
more about this packet.
Did
you hear me scream in Target today when I
saw these little Halloween shaped
macaroni and cheese noodles from Kraft???

Adorable
right? Good enough to eat, but even
better for some math fun!!!!


You
can sort them and you can graph them!
Talk about what you have more of and what
you have the least of… You can add
them up and subtract them!!! You can see
how many are in a box. The ideas are
endless!!!
Click here
to download the free sheet I created
to use with this activity!!!
Love
playing with food and learning at the
same time??? Then you will love all the
great ideas and free
printables on our Dem Bones page… So
many fun Halloween treats to get learning
with.
|
Some
Poems and Songs
The
Haunted House
(Tune of "Wheels on the Bus")
The ghost in the house goes "Boo!
Boo! Boo!"
"Boo! Boo! Boo!, Boo! Boo!
Boo!"
The ghost in the house goes "Boo!
Boo! Boo!"
On Halloween. The steps in the
house goes "Creek, creek,
creek..."
The cats in the house go "Meow,
meow, meow..."
The mice in the house go "Squeak,
squeak, squeak.."
The people in the house go "Eek,
eek, eek...".
(This is fun to use
in a pocket chart. Use graphics of a
ghost, house, steps, cat, mice, and
people.)
|
There was
an old witch, believe it if you can, she
ran through the windows and she ran, ran,
ran,
She ran helter skelter with her toes in
the air,
and cob webs flying from the old witches
hair. Shoosh,
went the wind, Meow, went the cat,
Plop went the hot toads sitting on her
hat,
We chuckled out "what fun, what
fun'"
on Halloween night when the witches
run!!!!!!!
|
Materials:
moon, broom, witch, cat, owl, and ghost
This is the moon that shone in the sky on
Halloween night.
This is the broom that sailed across the
moon,
that shone in the sky on Halloween night.
This is the witch who rode the broom,
that sailed across the moon,that shone in
the sky on Halloween night.
This is the cat that belonged to the
witch,
who rode the broom,that sailed across the
moon,that shone in the sky on Halloween
night.
This is the owl who woke the cat,
that belonged to the witch,who rode the
broom, that sailed across the moon,that
shone in the sky on Halloween night.
This is the jack-o-lantern that startled
the owl,
who woke the cat,that belonged to the
witch,who rode the broom, that sailed
across the moon,that shone in the sky on
Halloween night.
This is the ghost that carved the
jack-o-lantern,
that startled the owl,who woke the
cat,that belonged to the witch,who rode
the broom,that sailed across the
moon,that shone in the sky on Halloween
night. |
The poem on
the left and the pictures work great as a
pocket chart activity. (PICTURE OF POCKET
CHART - COMING)
The printables that
go with this activity can be found in our
Halloween/Fall 2004 Packet found at
http://www.teachingheart.net/primaryteachertimesaver.html
|
Some
Goodies to Print
A
Few Math Ideas
On a
file folder, glue either cut outs or pictures of
children, haunted houses, black cats, or even
ghosts. Have children put one pumpkin beside each
haunted house or have the children put one ghost
on each house... You can have several file
folders with different numbers of things for the
children to match
Have
child roll the dice. Have them put that many
ghosts on one haunted house. Roll again and do
the same on another house. Ask: "Which house
has more ghosts?" or "Which house has
fewer or less ghosts?" Do same with pumpkins
or jack-o-lanterns....
Some BBoards From My Classrooms
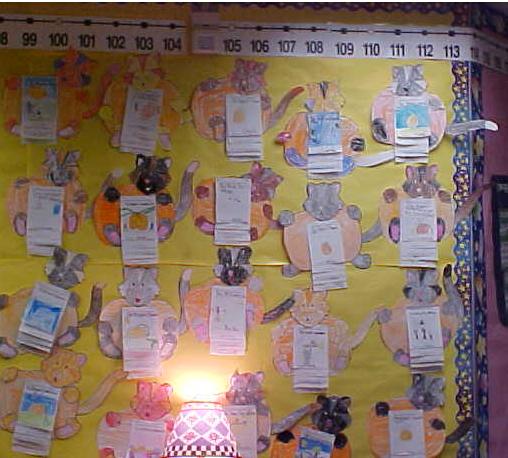
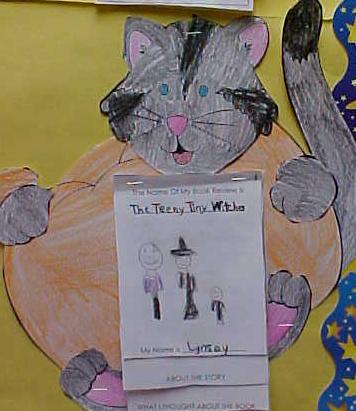
During
the month of October we read many books
dealing with Halloween or other October
theme related ideas.
After we
read each book, we discussed and
brainstormed some ideas as a group. All
of our ideas about a book went on a
chart. Then, each student made their own
little book about their favorite
story.
(CLICK HERE TO GET
THE LITTLE BOOK FOR YOUR CLASS)
Next, we colored cats with Pumpkins to
hold the book. The pattern for the Cat
and Pumpkin comes from a Mailbox Book.
|
|
Here is a Close-Up
of One of the Cats!
|
|
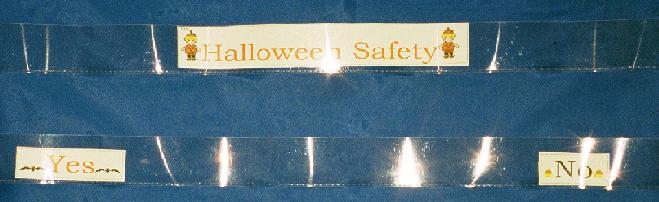
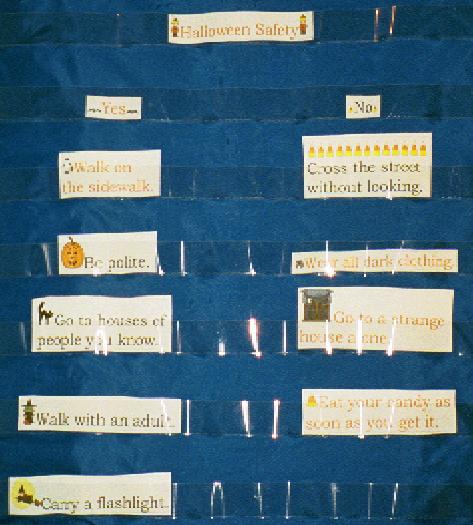
Make
sure your class understands Halloween
Safety! You can do this with a pocket
chart activity. Title the chart,
Halloween Safety. Make a yes column and a
no column. Program sentence strips with
statements such as:
Cross the street without looking.
Be Polite.
Walk on the sidewalk.
Go to houses of people you know.
Eat your candy as soon as you get it.
Now
as a group invite one student to read the
strip and another to decide if it should
go under yes or no. After you place each
strip discuss why they belong under the
column. Repeat this until all strips are
gone.
This
could also be used as a center.
You
may also use this to help students with a
writing project on Halloween safety.
You
could make your own like seen to the left
or you could order the October through
November CD and print and use the one
seen. To learn more about this CD &
our other CD's go to:
http://www.teachingheart.net/primaryteachertimesaver.html
|
|

|
Candy Corn
Rhyme Center. You can put these candy
corns in a pocket chart or a baggie and
have a ready to use center. Your students
match all the candy corns that rhyme and
then they fill out a center sheet about
the activity. This is found in our
fall/hallowwen packet or Volume 1 of our
packet CDROMS. To learn more visit: http://www.teachingheart.net/primaryteachertimesaver.html
|
Here
are some boards I have found on other sites!
|


