Around the Clock
Here is a center game to reinforce clock numeral
placement. For each game board, glue a construction
paper clock to a colored background. Label each of
several chips (in sets of 12 chips) with numerals 1 -
12. In turn have each player roll a 12 sided die,
then cover that number on her clock with the correctly
labeled chip. If a player rolls a numeral that has
already been covered with a chip, she must pass the die
to the next player. Continue play until on numerals
on each clock are covered. Around the Clock
Here is a center game to reinforce clock numeral
placement. For each game board, glue a construction
paper clock to a colored background. Label each of
several chips (in sets of 12 chips) with numerals 1 -
12. In turn have each player roll a 12 sided die,
then cover that number on her clock with the correctly
labeled chip. If a player rolls a numeral that has
already been covered with a chip, she must pass the die
to the next player. Continue play until on numerals
on each clock are covered.
Colleen:)/k-3
French Fried Counting Getting an
order of fries can add up to counting fun for your
students. Start collecting fry containers.
Then write a different number on each box. Make
fries by cutting yellow sponges into strips. Place
the boxes and fries in a center. To do this
activity, a child places the appropriate number of fries
in each box.
Colleen:)/k-3
Jars of Learning Gather some jars
that could be used for canning. For each jar you
gather think of a fruit or veggie to make out of colored
paper (apple, grape, corn, banana.) Now cut out the
shapes of the veggies and fruit. For each fruit or
veggie jar think of an activity to place on the
jars. For instance, one jar may be called apple
activities. You would cut out apple shapes and
label the jar appropriately. You may choose to
write math problems on the apples. The student will
take the jar and complete all the math problems on
another sheet of paper. You might choose to name
another jar corny questions and place corn cut-outs with
questions written on in the jar. The student will
take the jar and answer the questions on a sheet of
paper. Make as many jars as you would like (be creative)
and place them in a line on a shelf.
Colleen:)/k-3
Edible Math Students can review a
variety of math skills at this tasty learning
center. Place a box of colorful breakfast cereal
and a supply of three-ounce paper cups at the
enter. The student fills one cup with cereal.
Then she uses pieces to complete a variety of
tasks. Post the following tasks in the center and a
worksheet with the following:
estimate how many
pieces are in the cup and then count them to find
the actual amount
determine if the
total is an odd or even number
count the pieces by
two
determining which
color has the most number of pieces
create a color or
shape pattern
After the sheet is
finished and turned in, the student may eat her
math!
Colleen:)/k-3
Finger Spelling This activity is
so much hands on fun! Place a plastic shoebox, a
can of shaving cream, and a list of current spelling
words at the center. A student sprays a small
amount of shaving cream into the shoebox and uses her
finger to write the spelling word she sees. Or a
friend tells her a spelling word and she spells it
without looking. After she is sure the word is
correct she spreads the foam around to erase the word,
then repeats the procedure until all the words have been
spelled correctly. Your thinking
"messy" aren't you. Actually, I did this
with a life skills class using numbers and all you need
to do or have the student do is wipe it up with a paper
towel and the shoebox is ready for the nest
student. You may want to have four or five
shoeboxes in the center. If your students did not
like to practice their spelling words before, they should
after this!!!!
Colleen:)/k-3
Sequencing
Hang-up Hang a clothesline in your classroom and gather a
set of clothespins! Program a set of seasonal
shapes with desired vocabulary words or numbers; then
laminate the shapes for durability and store them in a
clothespin bag. Also make an answer key for
self-checking and place it in the bag. A student
sequences numbers or alphabetize words by suspending them
on the clothesline in the correct order. Students
won't have any hang-ups about sequencing practice with
this clever activity!
Colleen:)/k-3
Dictionary
Detectives If you are working on dictionary skills or
looking for a way to introduce dictionary skills here
goes! Post a list of spelling words, vocabulary
words, or content words at the center. Place
several dictionaries, pencils, and a supply of writing
paper at the center, too. have the students look at
each word on the list and then write the guide words for
the page where the word was found. Then have the
student repeat this for additional words. A good
idea is to provide an answer key at the center so the
students can check their work.
Colleen:)/k-3
I try to keep my eyes open for chats about the topic of
centers. I then add them to this area. It is great to
read ideas from other teachers and maybe then use part of
their idea or modify an idea to meet your needs. We are
very lucky that teachers are so willing to help those
that are looking for ideas. Here are some good ones I
have found on mailrings and chatboards for teachers!!!!
Thanks to all the teachers that have ideas below... You
are helping many!
MATH MENU
GEOMETRY GRADE 2/3
1.With
a partner collect 1 basket of pattern blocks. Take turns
sorting blocks into two different groups and ask your
partner to guess your sorting rule? (Some rules could be
shapes that stack, roll, slide, or shapes with 3 edges, 4
vertices, 6 faces)
2.Finish
these patterns: square triangle circle square triangle
circle square ______ ______ circle oval oval circle oval
oval circle ________ _________ Make up one more pattern
using 2-dimensional shapes.
3.Look
around our classroom, draw: 2 things that are rectangles,
3 things that are square, 1 thing that is a triangle, and
4 things that are circles. Remember to color the
pictures. (Grade 3 can also try to find a hexagon, an
oval and an octagon shape.)
4.Design
a robot using only one shape. Choose a square, circle,
rectangle, diamond, or triangle. Everything in your robot
has to be that shape. Have
fun! We will put these pictures up on thebulletin board.
5.Use
a set of tangrams to create a design. Trace around
theoutside of each shape.
6.Choose
2 geometric solids. Write 3 facts about how they are
different and 3 facts about how they are the same. For
example: a ball has 0 corners,
a cube has 4 corners. Think about their edges, vertices,
faces, and if they slide, stack or roll.
7.Use
a geoboard and create a shape with 1 elastic. Copy the
shape onto dot paper. Now use 2 elastics to create a
shape and copy this design onto dot paper.
8.Use
pattern blocks to trace different shapes out of
construction paper. Use these shapes, string, straws to
design a geometric mobile.
I
love to use math menus from Marilyn Burns. I divide mine
into appetizers, entrees and desserts. Everyone has to do
the appetizers, they can choose one or more from the
entrees. The desserts are more challenging, so they are
for after the students have tried the appetizers and some
of the entrees. I try to build learning from one menu
item to the other, such as:
Geometry
Appetizer
1. Using a basket of pattern blocks fill in one or more
of the pattern block puzzles using the interior outlines
to show you which shapes you need. Count how many you
used of each shape. (These geometric puzzles indicate
exactly which shapes they must use.)
Geometry Entree
2. Using a basket of pattern blocks and a baggie of
pattern block puxxles try this activity. Fill in the
first puzzle using the shapes indicated. Now, using the
same puzzle design, recreate using other pieces by
ignoring the interior lines and just following the
outside boundaries. Count and record how many you used of
each shape.
Geometry Dessert
3. Using a basket of pattern blocks and a blank piece of
paper create a pattern block puzzle. Trace around the
outside. Count and record how
many you used of each shape. Give the traced pattern
block puzzle outline to a friend. See if both of you
created the puzzles the same
way. Try it again with another friend. Remember to count
and recordhow many you used of each shape every time you
recreate a new puzzle.
The Pattern
Block: a game for 2 children
How
to play:
Children
play this game in pairs.
Children take turns rolling the die and moving their game
pieces around the board.
After each turn, the child takes the number of pattern
blocks shown in the box where
he/she landed.
When the game is finished, each child creates a design
using the pattern block pieces
he/she has collected.
Materials:
15
pattern blocks of each color
2 teddy bear counters for game pieces
1 game board
Posted
by jenny/2/oh on 4/24/02

caththorn2@yahoo.com
writes:
HI,
I see many
people are taking about centers. I have done them
many ways. (free choice, by catergory, by group) I
have been working on my centers since I began
teaching. I have a workable solution but it changes
every year. I find some classes need different
amounts of control than others. This year I have a
very nice class that can easily stay occupied for up to 1
1/2 hours. This class loves to listen to stories on tape
and play games so my stations are set up to accomodate
thier interests. I am horrible at writing but this
is a fair idea of what I do almost daily.
I have 4 stations that my students rotate through on days
I want to work with small groups. This would be my
chance to work with leveled groups. I teach
specific strategies that the group needs. I do not
teach the same lesson to each group. Studetns
change groups often as their needs dictate. I try
to do stations 3-4 times a week. On these days it
goes something like:
Groups vary in size from 2-3 to a maximum of 6-7.
Each group is a color name. Roughly the lighter the
color the easier the material they are given to work
with. I have a chart with group assignments on the
board. Each station has a colored game for that
group. Yellow group always takes the yellow folder
and so on.
At the beginning of the year I teach every game at my
station while the other students play games or put
puzzles together or color. My goal the first week
is to teach them to move from one table or area to the
next with as little confusion or talking as
possible. Slowly I add a game to each
station. My games are all leveled so the beginning
of the year the games are very easy and get progressivly
more difficult. I make most of my own games but
have been know to purchase games. (LAKESHORE). I do
not alter the rules to the games but make them
progressivly harder. I teach at a very low SES
school so most my kids do not know how to play simple
games.
Setup - I
have 4 stations. I try to have 4 groups of desks to
tables to use but since I rotate room 4 times a year that
is not always possilbe. I choose the areas for each
station and then do not move them. It might be a
carpet, group of tables or desks or just an area.
My lowest group always starts at staionnumber 1 and moves
on sequentially. This is easiest for them. I
am always station 4. At the beginning of the year
stations might only be 5-10 minutes at each
station. By the end of the year they might last 25
minutes. It depends on the day.
Stations -
I have my games divided into comprehenion blending
and segmenting skills, written communications, high
frequency words. IN the past I was lucky and had a helper
in the classroom for stations. I no longer have any
help but used my aids with the High Frequencey games.
Comprension
- beg of year listening to books on tapes and coloring a
book report. Later writing book report end of year
reading books and writing a response to me about the
book. I often read books on a casette and kids
listen to me reading a book. This might even be a
book from our reading series. I try to keep the
book length abut 5 minutes of reading leaving lots of
time for them to write me about the book. This is a
great way to see what they are understanding.
Blending
and Segmenting - Beg of year. If I have enough
computers (some rooms do not have any) I use computers
for this station. If not I do amkaing words type
activity. I record my voice on a tape. Kids
play the tape and make the changes. They start and
stop as needed. I also stress beg sounds at this
station as well as memorizing patterns. I have many games
I have made that use these strategies. One of the
easiest is I found picture and put the name on the back
(example a picture of a cat on the front CAT on the
back). Kids sit at a cocokie sheet with
magnetic letters and look at the picture. They use
the letters to spell the word. For my lowest they might
only be trying to get beg sound or ending sound and so
on. I have lots of picture made and sorted by work
family, vowel sounds, spelling patterns and so on.
Written
Communications - beg of year this might be dittos from
our reading series (district mandates we use them so I do
here) At the end of the year this is more a free
writing area making up stories. I often leave a
stuff animal or small plastic toy at each desk.
They write me all about the item, or a story about the
item. They can work on this for days. Each
child as a folder (stored in a folder holder) at that
station.
High
Frequence - Bingo with HF words, Wordo with HF words,
Checkers with HF words and any other game I can think
of. Kids take turns being the caller on BINGO or
WORDO (tic-tac-toe with words). I control the
words. They might be a spelling pattern we are
learning, high frequency words or even wrods that I am
hearing many mistakes on. Each group will have
their own words so that they are working where they need
to be. Kids love this station as they think
they are playing games.
My station
- this is where I target skills a child or group of
children need. It gives me a change to hear every
child and work with them in a small group.
I will also use this setup on days I need to test but I
only have 3 stations and I call out indivuals to be
tested. I see myself using this with some of the
ideas I have taken from OSG. I can see her
confrence time as similar to my station time.
I hope this is not too confusing.
CAT
STockton, cA
I used a pocket
chart to hold my center information. It was so easy
to flip my cards from morning to afternoon and also to
rotate the groups daily. I made one set of student
groups with their group name and their individual names
on it. I would place that card first. Then I
made four sets of each center card. For instance
the "Reading Nook" was duplicated four
times. I post a matching card at each center.
I usually have four centers that are required. The four
centers are lined up after their name card. I then
rotate the center cards each night before going
home. It just takes a minute to slide them all
over. The kids seem to do better when I don't
change their name cards. I then have "Happy
Face Places" that are marked around the room. The
children can visit a HFP anytime they have completed and
shown me their work, or they have rotated through all
four centers. I have a center file box set up by
their cubbies. They file their center work as they
finish that center. Not all centers will have
something to file. By the end of the year, I have
them write down the title of the book that they read or
looked at even at the "Reading Nook." I
can check daily on how many centers they visited or how
much "time" they spent on each. I also
can ask a child to bring me his/her center work if I
suspect they are heading to a HFP prematurely. This
system has worked very well for me. The kids seem
to understand it after only a day or two of
modeling. I hope this helps! Have
a great day!
Whitney :)
Because I use 4 blocks, I don't
have "traditional" reading groups. I have
several different activites available for the kids to do
during "activity time" (that's what we call
it). Each activity has a certain number of tickets
(laminated pieces of 2" x 4" construction paper
- different color construction paper signifies which
activity that child is doing). I only have 3
tickets for Listening Center because I only have 3
walkmen right now - one broke and I haven't replaced it
yet. I just make sure there are about 25 tickets
available so kids can move around. Here's a day's
example: Computer Center - 4 tickets (we have 4
computers); Listening Center - 3 tickets; Art Cart (I
have a couple of rolling carts that I fill with crayons,
markers, templates, glue, scratch paper, etc... that the
kids use to draw - it makes me feel better about not
doing as much art as I'd like to) - 4 tickets;
Reading Center - 4 tickets; Lego Center - 4 tickets;
Puzzles - 4 tickets. I excuse each table to choose
their activity (tables rotate who chooses first).
Oh, and students who have unfinished work cannot choose a
ticket until all their other classwork is finished.
So all the kids are engaged in activities - what do I
do? I use this time to pull students who need extra
help or who were absent and need to work on an
assignment. I only do "activity time" for
30 minutes a day and I found this time sooooooo helpful
to play "catchup" with kids who've missed class
and give those students who need extra support.Hope this
help - Kim/1st-2nd/CA
You need to
practice your centers and the behavior you want their
before you try doing anything else. Be ready
for a working humm. I spend time at the
beginning of the year teaching the kids how to rotate
through the centers, what is expected while they are
there. They also need to learn that they may
not interrupt the teacher while she is with a
group. They may ask questions bewteen groups.
They also need to know which students that they can ask
for help. The best rule is no more that two people
at a center. The more grades in your
school that do the centers, the easier it will be for you
to teach them. I'd suggest using stationary centers
like they have in Fountas and Pennel. You'll
save a great deal of time, the kids won't play with the
"cute" games, save your time. Good
luck! Robin in Missouri
CeeGee14@aol.com
wrote:
Hi all! In my room, I collaborated with the other 2nd
grade teacher at my school. We decided together what
centers to do and brainstormed together. Although we did
the same ones, I adapted those to fit my style. I am
sending the centers that we used with a description. If
you have further questions please ask. I am planning on
using them next year, so if you have ideas,
please add (I love hearing suggestions!!).
1.
Proofreading--(everyday) This center had to be done first
everyday. The students were given 3 sentences, poems,
statements or 1 paragraph a day to proofread and correct.
Mistakes included end marks, names, addresses, beginning
capitals, any other grammar mistakes that had been
introduced previously. These sentences were gone over at
the end of the center period.
I know that proofreading in isolation isn't necessarily
the best way ! to teach grammar, but it is required on
our standardized test (PACT). We thought this was the
best way to cover grammar everyday.
2. Poetry--(Once a week) I
introduced two poems on Mondays before shared reading.
The class discussed what the poem was about, any poetic
elements (rhyming words, etc.), as well as ways to
illustrate the poems. Then during the center time, the
students would read the poems and illustrate them in
their Poetry Journal. The students were also allowed to
read these during
reading times.
3. Browsing Boxes--(Twice a week)
The books in the baskets are books that the students have
read during guided reading with me. These are books that
are on the students reading level or slightly lower. The
students are allowed to browse through these books and
read ones that they are interested in. Ideally, all these
books have been read with the teacher, but I put books
from the same sets in the baskets. For examp! le, if I
read an Amelia Bedelia book with a guided reading group,
I wouldn't hesitate to put another Amelia Bedelia book in
the baskets. I believe this keeps the students from
getting bored with the choices.
4. Listening Center--(Once a week)
I have one listening center set up with 3 head sets and
enough books so that each can have a book to follow along
with. This was the hardest to plan, because most of the
books that we used, we had to make. However, the students
thoroughly enjoyed listening to the stories and following
along with them. Next year, I am planning to do something
with the books every once in a while, such as write a
different ending or something to get them a little more
involved.
5. Partner reading--(Twice a week)
The students partner read with someone in there center
group, which is not in their guided reading group. The
students are reading with someone who could be reading on
a higher or lower level! . The studnets are allowed to
pick any book (which does not have to be a browsing box
book) to read, as long as they are reading. This one
sometimes takes a little more guidance, but is very
helpful for students to "practice" with someone
that can listen and help.
6. Spelling center--(Twice a week)
This center definately helps when cheering the words
becomes mundane. In this center I had magnetic letters, a
baking pan, and a magna doodle. Therefore two sets of
partners could be working at one time. With the magnetic
letters, the pairs of students were practicing spelling
the word wall words for the week by "quizzing"
each other. With the magna doodle, the students practiced
spelling any word wall words. One student would call out
some words and check them after the other wrote them,
then they switched. On Friday's spelling test we test the
5 word wall words and 5 words from around the room, so
this helped with both.
7. Accel! erated reader--(Twice a
week) During this time the students were allowed to read
and take AR tests. This is an incentive program in our
school. The scores for AR seemed to go up, as well as the
students interest with this center. I did not require AR
test to be taken. The important thing for me was that the
students were reading.
8. Wee mail--(Twice a week) At our
school, we have the Wee Mail program set up where
students write letters to friends and teachers and it
goes through the mail system. During this time, the
students were allowed to write letters to friends that
did not and could not (due to time) get written at other
times. This increased the amount of writing in the
classroom.
While the students were in
centers, I was working with a guided reading group
(ability grouped) at a round table. We worked on reading
skills that the students in that group needed. It was
time for me to spend working with small groups. !
Although I didn't do it this year, I would like these
small groups to engage in literature circles during this
time next year. I did not start centers until after
Christmas (half way through the school year). I left
shared reading as a time to work on comprehension
(stories out
of the basal) and those groups were left as multi-ability
groups. I had about an hour and a half each day for
centers. Some days less depending on time. I did not do
SSR after I started centers because there was plenty of
reading and choice that the students were doing. I always
introduced the WWW on Monday using Working with Words,
but some days during the week this was left out (the
students had the center to work with the words). I am
planning on using centers all year next year. I
definately saw the benefits, such as increased indepence
among my students. There were a few who did not use there
time wisely, but for the most part the students loved!
the idea of being able to work at their own pace. Reading
scores went up, so I know that the reading helped and
most used the time wisely!!
I am know that this e-mail is long, but for those of you
that read it, I hope that it gave you some ideas that you
could use. If something is not clear, please ask
questions. If this sparked ideas or you have some of your
own, please share.
Have a great summer,
Christy
2nd/SC
I just came
from a 2 day workshop on Lit Centers for K-2. The
presenter said she divides her class into groups of no
more then 4, One high, one low and two ave. She does
centers for 2 hours and 20 min. The centers are: Writing
Activity, 2 practice reading(one for guided readers they
have been using in group and one for free choice or AR),
a listening center with about 40 taped books available,
working with words center and an optional activity center
for theme, MAth, Sci,SS, or computers. They are
every center every day.
She calls a guided reading
grooup every 20 minutes, so they come from differnt work
groups to be in their ability group for guided reading
instruction.
The last 20 minutes is a
make up time for whatever center they missed at Guiding
Reading time.
In the writing center they
do a journal activity, step book, pop-up book, shape
book, friendly letter, post card, lists, response to
reading, etc.
At the working with words
she has an assigned activity every day too: Bingo, Rivet,
Pocket charts, and I can't remember them all.....it's in
my notes.
Anyway if you have
questions you can email me back.
Terry
Centers can
be a very worthwhile and much loved time for the kids if
you don't make yourself go nuts in theprocess. =-) As
someone else mentioned, I think the key is to keep it as
simple as possible. The general format of my centers
stays the same each week and I just modify the activity.
I am very careful about the amount of planning that I put
into my centers. If I'mspending more time prepping for
them than I am for my actual reading lessons, something
is wrong.I use a very modified workboard from the
Fountas and Pinnell book.
My kids have one main center that they\ go to each day. I
usually meet with two guided reading groups a day.
Whichever group comes to me first doesnot go to a
"main" center that day. Instead, they finish
any center work that is not yet complete and is in their
folders (more on those to come) and then they can do one
of the secondary centers. On Fridays, the kids go to
whatever center they didn't go to in the week when they
were with me for the guided reading group as the first
group back. I have four main centers that the kids rotate
through.They are as follows
Dialogue Journals/Poem
Illustration: Students write to me in their composition
books in the form of a friendly letter and I write back.
It's a great way torecord growth and is a super
assessment tool. I like doing them as a center because I
only have 4-5 to write in a night. When they finish with
their d.j. they illustrate the poem of the week that will
beadded to their poetry notebooks on Friday. I started
adding this to center time because they could do it
completely independently and it seemed like I wasn't
using time wisely when we gave up 15 minutes for the
hwole class to stop and illustrate a poem.
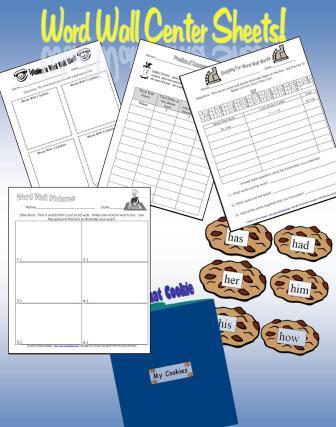
Working With Words Center: The
kids might do a writing around the room looking for
digraphs, play a word wall game (Get the book Making
your word wall morer interactive-
great ideas that can be adapted for centers. I usually
teach them one week whole group during our working with
words block and then the next week the kids can do it
independently in the center.)Rainbow words, magnetic
spellings, etc. are all examples of things we do during
this center
Reading Center: Listening Center
with tapes is commonly used for this center. My kids need
to do some type of response to it when they are finished.
This center might also feature some type of extension
activity that is going along with whatever story we're
reading whole group. Getting out some big books, reading
around the room, etc. are all options for this center.
My fourth center each week is
usually my only one that I need to think and plan for. I
often have some type of activity that correlates with our
science and social studies themes but involves reading
and writing. For instance, during dinosaurs, the kids
completed (wrote and illustrated) a flip book with five
facts they learned about dinos. They also enjoy\par when
we do research at this center. During the oceans, they
had to choose a book about an ocean animal from the tub,
read it, and then create a 3-dimensional cubes with
facts/illustrations. I also may make this be a math
center: writing word problems, creating a menu to use
during a math lesson on money, etc.
Finally, if I have a very cool art
project that I don't want to take time away from my large
group instructional time to do, I'll have the kids do it
during center. I tend to limit my centers to
reading/writing activities, but I figure one that is just
art won't hurt from time to time.
Ceneter Folders: I also have
struggled with the management issue of keeping track of
things in the past. I went to a great conference by Linda
Holliman of BER. She showed us how to make a four pocket
folder out of oaktag. Take two large pieces of oaktag (I
use 24 x 36). Fold one in half with a hot dog fold (the
long way) and\ then fold into a hamburger fold. This will
make up the pocket part. With the second paper, Fold it
in half as a hamburger fold (short way) and then open it
back up. Place it (the paper is going horizontally)
inside the fold of the one you folded as a hotdog/hamburg
fold. Then fold it and voila! you have a 4 pocket folder.
Staple the ends to create the pockets. On the outside,
the students put their names. On the inside pocket, they
write still working, on the right-hand inside pocket they
write finished, and on the back, cubby (or mailbox, home,
etc..) They may then illustrate the top parts of each
page of their folders. (Oh, the decorating of the folders
is actually one of their first center activities!).\pWhen
they are at centers, all center work goes in the folder.
At the front, they can place center menus,directions,
etc.. When they finish something it goes in the finished
side. Anything that is still being worked on gois in the
still working pocket. At the end of centers they put the
folders in one of two crates. If anything is in the
finished side, it goes in the crate labeled finished. If
they have nothing on that side, it goes in the other
crate. This way, I only have to go through folders that
have something completed. After I check off the kids
work, I either put it in the home/cubby pocket or back
int he still working (corrections, not completed, not
done up to\par the standards, etc..) The kids go through
their folder the next day and put any papers from teh
back pocket\ into their cubby and then get to work. It's
been a lifesaver!!! I hope this makes sense. If anyone
has any questions, please feel free to email. Paula
The easiest and most popular
centre (station) in my room this year is Writing Around
the Room. We didn't do this one until later in the year
but they love it. I cut up the long sheets of
foolscap in half and I have 4-5 clipboards all stored in
a box. Each child gets a clipboard places a
sheet of paper on it and then for the next 15-20 minutes
they literally write around the room. Many copy the
daily morning message or parts of it. Others make a
list of words from labels around the classroom or word
wall words or copy friends names off of
charts around the room or book titles off the
shelf. A few on my students are drawing things at
first but usually label them as well or at least
try. At the end of the station time (I set a timer
bell) each student date stamps their sheet and
places it with their name and number on it in the
finished box. I don't mark these but I can see what
they did in that time period. I file these in
their archive and then they go home with everything
else once we pull 3 items for our portfolios.
You can also do reading around the room with a few
pointers and then they partner up and take turns reading
around the room to each other.
Start out with very limited
choices and spend time teaching the kids exactly what you
expect. Start with the least complicated centers and when
those are working smoothly add new ones. Don't try to
start any sort of small groups for at least a month or 6
weeks. Spend that time monitoring the groups and
interacting with the children. When all your centers are
up and going independently, then start your small groups.
Good luck! Addie/mo
on 6/17/02
I agree with Addie, spend LOTS of
time explaining and modeling how things work and give
lots of praise, positive reinforcement... I have had to
try several different methods for center time. Each
teacher is different, so what works for one may not work
for another. I am currently searching for another new
method for next year, but here is what I have tried over
the years:Free choice centers= lots of time spent at the
beginning of the year modeling, etc.., kids get to choose
their centers independently. During this time I would
work in small groups on activities, projects, guided
reading, etc...This method was my favorite until I lost
my assistant due to budget cuts. The kids get to become
independent and make their own choices and become
accountable for their own actions.Rotation centers= This
is the method I had to go to after my assistant was cut.
I found that I had too many students to circulate around
the room independently without a "go to" person
in case of emergency or other mishap. I was spending all
of center time taking care of little things instead of
getting any work done in small groups. I used Microsoft
clip art and some real photos of each center in the room
to make groupings of centers. On a red piece of
construction paper I put 3 pictures; Computers, blocks,
puzzles etc... Then on yellow 3 more centers and so
forth, you get the idea. Then the kids were grouped into
colors and I tried to seperate the troublemakers into
groups with the level headed ones. Each day each group
had 3 centers to rotate through and there were 3
"free" centers that they could visit if they
were finished with all 3 centers. This seemed to work and
take care of alot of problems during center time, but I
just felt like I was cheating the kids out of alot of
things.
This year I am looking for something new... hopefully
somebody on this thread will have a better idea...
Good Luck,
vanna/tx
Hi. I have a literacy
center time in the morning and a free center
time in the afternoon.
In the literacy centers, I
have 2 students per center. There is a chart with velcro
pictures of the centers I can take off and rotate to the
next group of kids names. This way, I can change out the
centers if they start to get bored as well. I take
digital pictures of all the centers, lamintate, and
velcro them. After 20 minutes, the kids rotate to the
next center. They will only do three literacy centers per
day. One of these will include a thematic lesson (various
depending on what we are working on), others include ABC
stamps to spell words on the word wall, letter tiles, abc
boards matching magnets to alphabet letters, headphones,
magadoodles, leappads, etc.
In the afternoons during
free center time, they are able to choose from any center
at random. However, the rule is that no more than 4 kids
can be in any center. If they are arguing over a specific
center, I either set a timer for them to switch, or if
they keep arguing they both are not allowed to play in
that center. They learn really quick to work on a
compromise :) - Brittany on 6/23/02

Logo & Webset Design By GoneCountryGraphics.com
|